29 Simple Christmas Nail Ideas You Can Actually Do at Home
Introduction
Simple Christmas nails don’t need salon appointments, gel lamps, or a steady hand honed by years of practice. Most of the best holiday manicures start with one or two polish colors, a good top coat, and a single small detail that signals the season. A dot, a stripe, a sprinkle of glitter, or one accent nail can do more than a full set of tiny hand-painted scenes.
The ideas below are built for real home manicures. Some take ten minutes and no special tools. Others use a dotting tool, a thin brush, or a sponge, all inexpensive and easy to find at drugstores and craft stores. You’ll find options for short natural nails, longer shapes, bold colors, and quiet neutrals, so there’s a starting point whether you’re getting ready for a work party, a family dinner, or Christmas morning.
1. Classic Red Cream With a Glossy Top Coat

A true Christmas red needs very little help. Choose a cream formula in a warm, slightly blue-leaning red for a traditional look, or a brick-leaning red for something softer. Two thin coats work better than one thick coat, since thin layers dry more evenly and are less likely to smudge.
Finish with a generous layer of glossy top coat and cap the free edge by running the brush along the tip. That small step helps the polish last longer and keeps the color from chipping at the edges. If your nails are short, a rounded or squoval shape keeps the red looking clean and polished.
2. One Snowflake on a Sheer Nude

Start with a sheer pink or beige polish that evens out your nail tone without looking opaque. Then pick one nail, usually the ring finger, and paint a simple snowflake on it with white polish and a thin nail art brush.
Begin with a small cross, add a diagonal cross over it, and finish each line with a tiny dot or short tick mark. It doesn’t need to be symmetrical. A slightly imperfect snowflake looks hand-drawn, which is part of the charm. Seal everything with top coat once the white has dried fully.
3. Deep Green Jelly Polish

Jelly polishes are translucent, so they have a glassy, glowing look that suits dark evergreen shades. Build the color slowly with three or four thin coats until you reach the depth you want. A sheer layer over a pale base will look lighter and more emerald, while a darker base gives you a rich forest tone.
Because the finish already looks shiny and dimensional, you can skip any extra decoration. A single clean coat of top coat is enough. This is one of the easiest ways to look festive without drawing anything at all.
4. Red, Green, and Cream Mix-and-Match
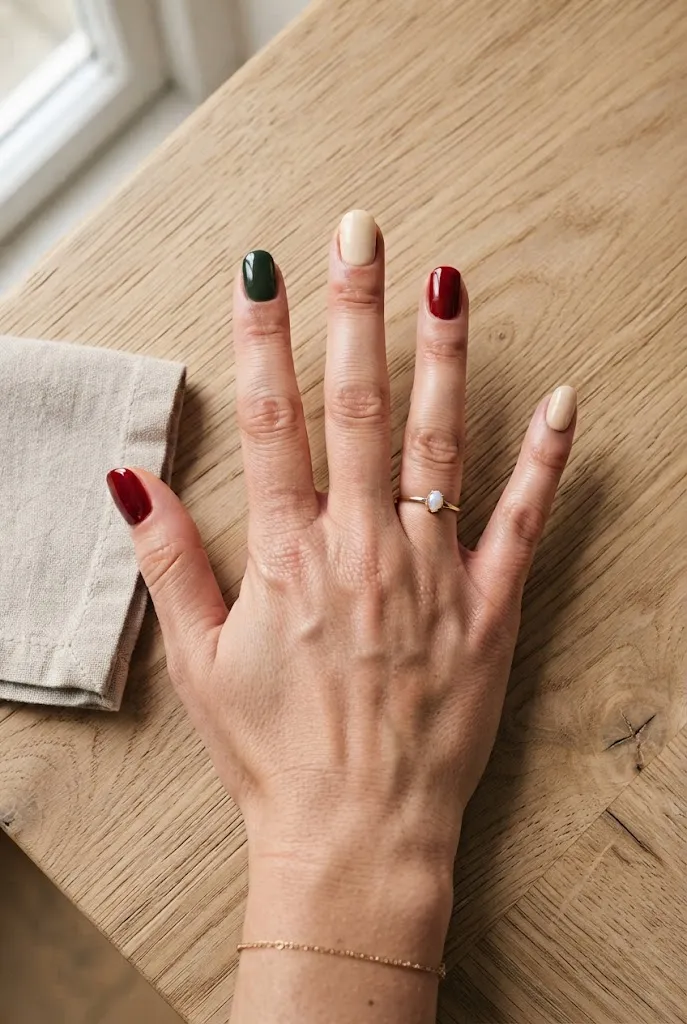
A skittle manicure uses a different color on each nail, and the holiday version stays within a small palette. Try deep red, forest green, and warm cream, repeating the colors across both hands.
- Use two shades per hand if you want a calmer look.
- Keep every finish the same, all creams or all shimmers, so the set feels intentional.
- Add a clear top coat across all ten nails to tie them together.
It’s a good option if you can’t decide on one color, and it forgives small mistakes because no two nails need to match.
5. Candy Cane Stripe Accent Nail

Paint your base in soft white or a creamy off-white and let it dry completely. Then lay a few strips of thin striping tape across the nail on a diagonal, leaving gaps between them. Paint over the gaps with red polish and pull the tape off while the red is still slightly wet.
You’ll be left with crisp diagonal stripes that look like peppermint candy. If you don’t have striping tape, a thin brush and a steady, unhurried hand also work. Keep the other nails plain white or red so the striped nail stands out.
6. Holly Berries Made From Three Dots
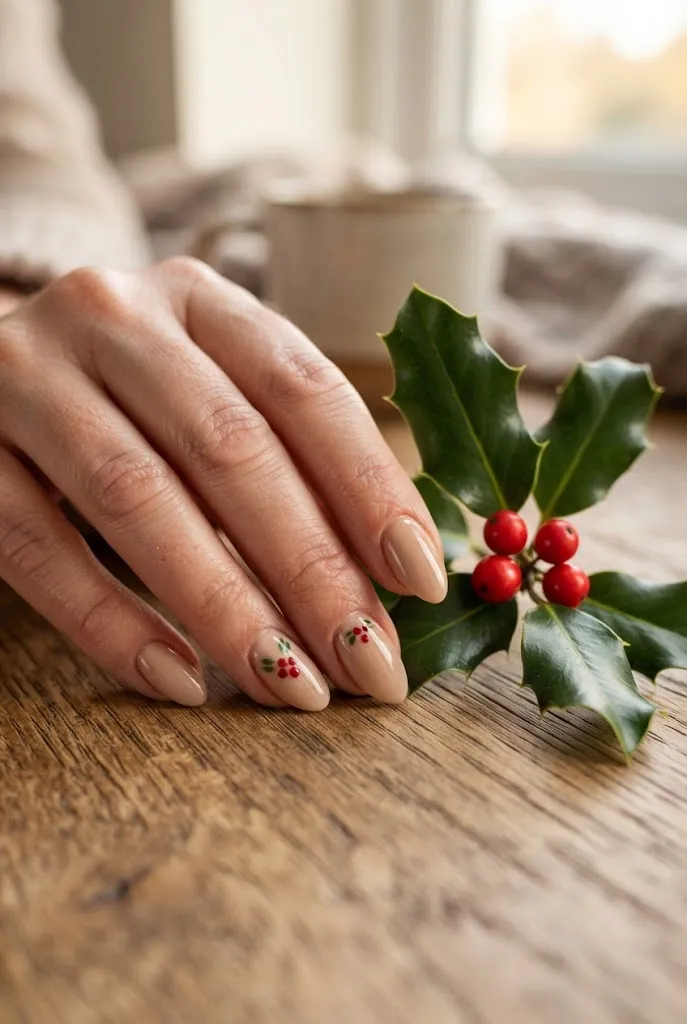
On a pale nude or soft white base, use a dotting tool or the head of a bobby pin to place three small red dots in a tight cluster near the cuticle or the tip of one nail. Add a few small green leaf shapes beside them with a thin brush, pulling each stroke from the center outward to taper the end.
The berries read as holly with almost no effort. Repeat the design on two nails for a balanced set, and keep the rest of the manicure plain so the dots stay the focal point.
7. Sponge Glitter Gradient

For a quick fade, brush a strip of glitter polish onto a makeup sponge, then dab it onto the nail tip, building density toward the free edge. Keep the base a solid color such as deep red, forest green, or sheer pink so the glitter looks like it’s rising from the tip.
Dab rather than swipe. Gentle tapping gives a soft fade, while dragging smears the glitter into streaks. Top coat will smooth the texture, though you may need two layers to fully cover the raised glitter particles.
8. Red French Tips on Short Natural Nails
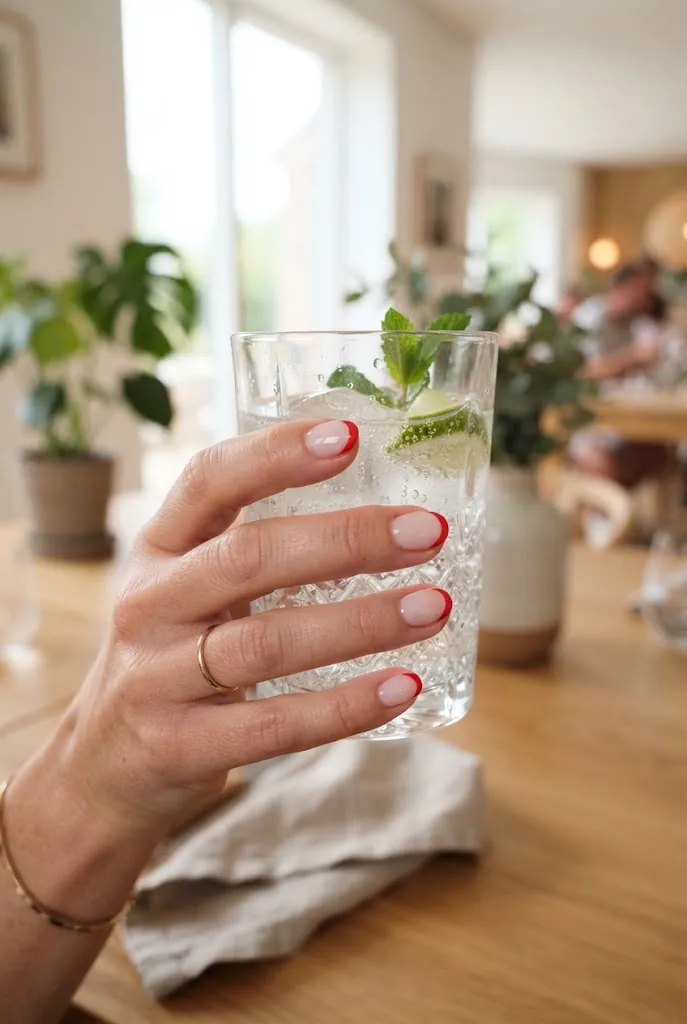
Swap the traditional white tip for a red one. On short nails, keep the line thin and slightly curved so it follows the natural smile line of the nail. Use a sheer pink or milky base so the red has something soft to sit against.
If painting freehand feels hard, use small tip guide stickers or even a piece of tape cut into a curve. Paint the tips, peel the guide away while the color is still tacky, then seal with a glossy top coat. It looks tidy and understated at a holiday dinner.
9. Gold Foil Flecks Over Burgundy

Burgundy is a flattering alternative to bright red, and gold foil flakes add a quiet shimmer. After two coats of wine-colored polish, apply a thin layer of clear polish or top coat while it’s still wet and press a few foil flakes on with a tweezer or the tip of a small brush.
Scatter them unevenly, with clusters at the tip and one or two near the base. Once everything is in place, seal with a thick top coat so the foil edges lie flat and don’t catch on sweaters.
10. Snowfall Speckles on Charcoal Gray

Dark gray works as a moody winter base and gives white speckles real contrast. After the gray has dried completely, dip a dotting tool into white polish and tap tiny dots across the nail at different sizes. Vary the spacing so some dots sit close together and others float alone.
Avoid placing them in rows. Random, uneven placement looks more like falling snow. A matte top coat gives it a soft, velvety finish, while a glossy one makes the dots stand out more sharply.
11. Mini Plaid Accent Nail
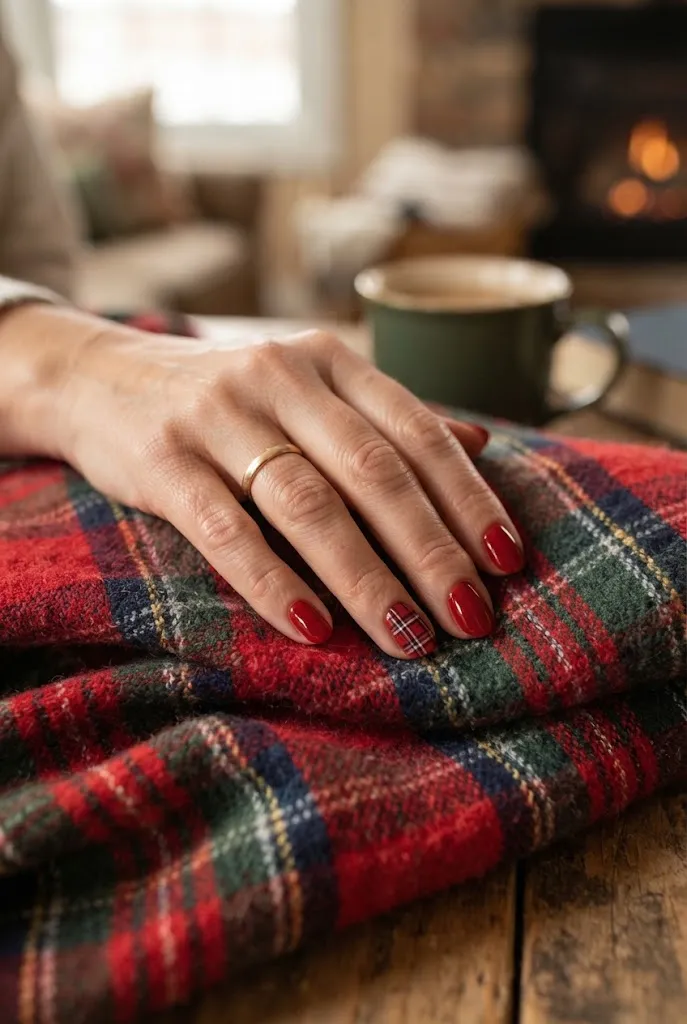
Plaid is one of the more recognizable holiday patterns, and a single accent nail keeps it manageable. Paint a red base, let it dry, then use a thin brush to draw two or three vertical lines in dark green or black, followed by horizontal lines crossing them.
Add a thin white line along one direction if you’d like more detail. The lines don’t have to be perfectly straight, since plaid fabric has its own slight irregularities. Keep the other nails a solid color pulled from the plaid for a cohesive set.
12. Tiny Christmas Tree in Negative Space

Negative space designs leave part of the natural nail visible, which means less polish to apply and less to fix. Paint a small green triangle in the center of each of two accent nails, using a thin brush to build the shape in three stacked tiers.
Add a small brown line at the base for the trunk and a gold dot at the top if you’d like. The rest of the nail stays bare or covered with clear polish. It’s graphic, quick, and comfortable on very short nails.
13. Velvet Burgundy Magnetic Polish
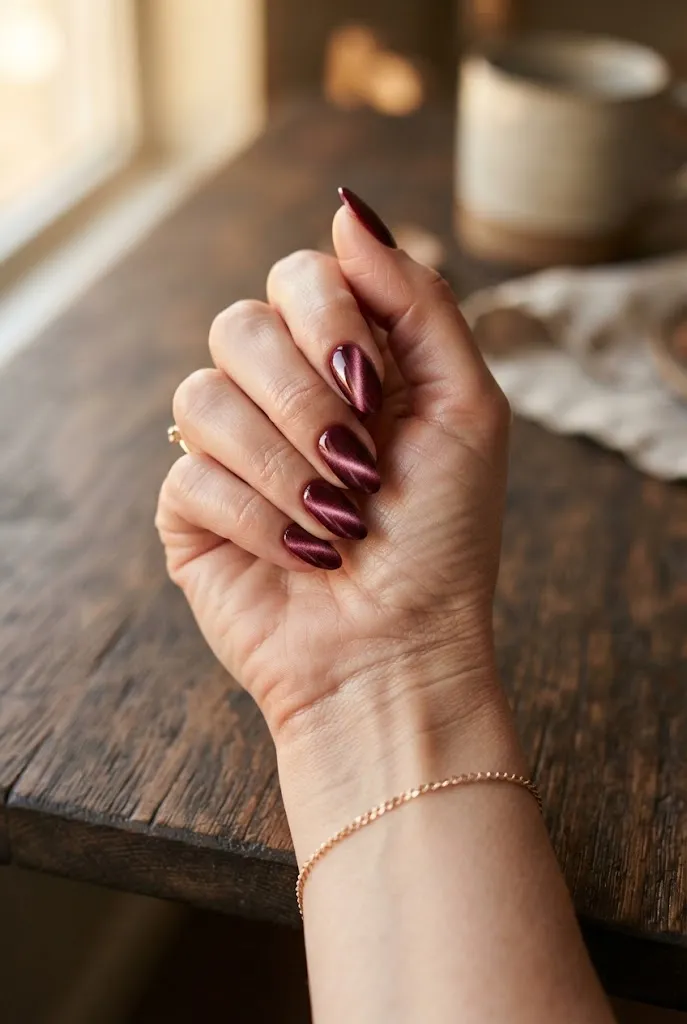
Magnetic polishes contain fine metallic particles that move when a magnet is held close to the wet polish, creating a soft, velvety shimmer. Apply one coat, hold the magnet near the nail for about ten seconds, and the effect appears.
Burgundy and deep green are the classic Christmas shades. Because the pattern comes from the magnet, you don’t need to draw anything. You’ll need to work on one nail at a time, though, and cure or dry each one before moving on if you’re using a gel formula.
14. Sheer Blush Nails With a Red Ribbon Bow

A bow is easier than it looks. On a sheer blush base, use a thin brush to paint two small loops side by side in red, joined at the center with a tiny dot. Add two short tails below, angled outward.
Put the bow on one or two nails and leave the rest plain. If the shape is wobbly, wait for the red to dry and tidy the edges with a small brush dipped in a little polish remover. The result is gentle enough for the office and still clearly seasonal.
15. Silver Glitter Accent Nail on Any Color
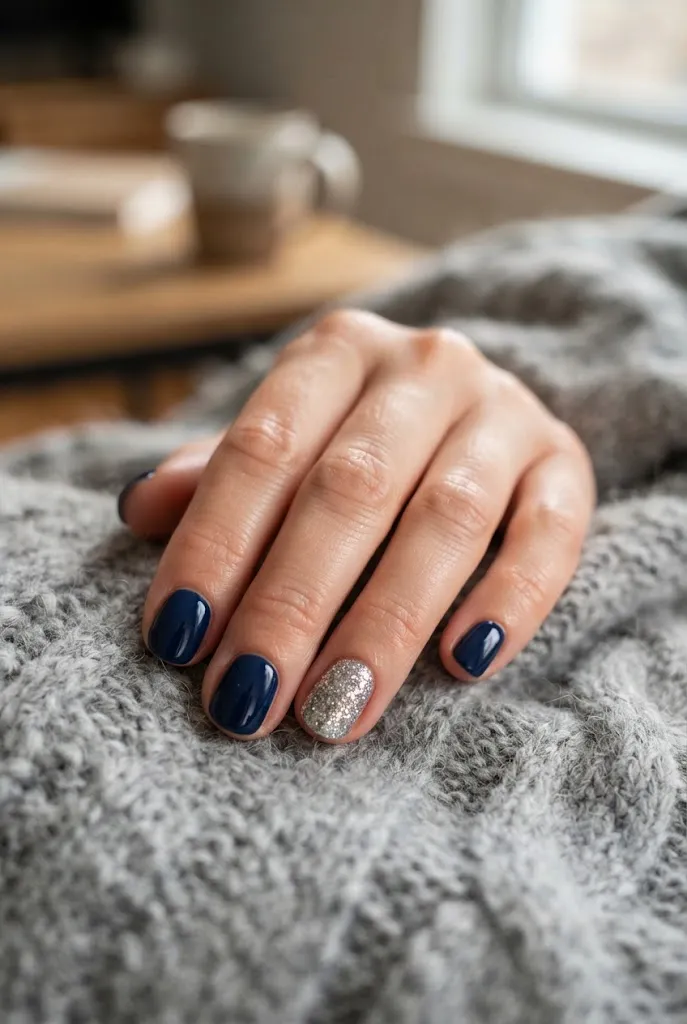
If you already have a polish you love, you can make it holiday-ready by turning the ring finger into a glitter accent. Paint the nail with a silver or champagne glitter polish. You may need two or three layers for full coverage.
Pair it with a solid red, green, navy, or even a neutral beige. The glitter nail brings the festive feeling, so the rest of the hand can stay simple. For easier removal later, put a base coat underneath, since glitter polishes are notorious for clinging.
16. Evergreen Sprig Drawn With Thin Lines

On a soft white, cream, or pale gray nail, use a thin brush and dark green polish to draw a single curved line from the base of the nail toward the tip. Then add short diagonal strokes on either side, angled upward like pine needles.
Keep the strokes slightly uneven so the sprig looks natural. A couple of small red dots near the stem turn it into a berry sprig. This one looks refined on long almond nails, where there’s room for a delicate vertical design.
17. Gingerbread Brown With White Icing Squiggles

Warm brown polish gives you the base of a gingerbread cookie. Choose a muted, cinnamon-leaning brown rather than a dark chocolate, so the white details stand out. Once the brown has dried, pull a thin line of white polish along the free edge in a wavy pattern, like icing on a cookie.
Add two or three tiny white dots near the cuticle as buttons if you want a little extra detail. It’s playful without being childish, and the earthy color pairs well with cream knitwear.
18. Santa Hat Ring Finger
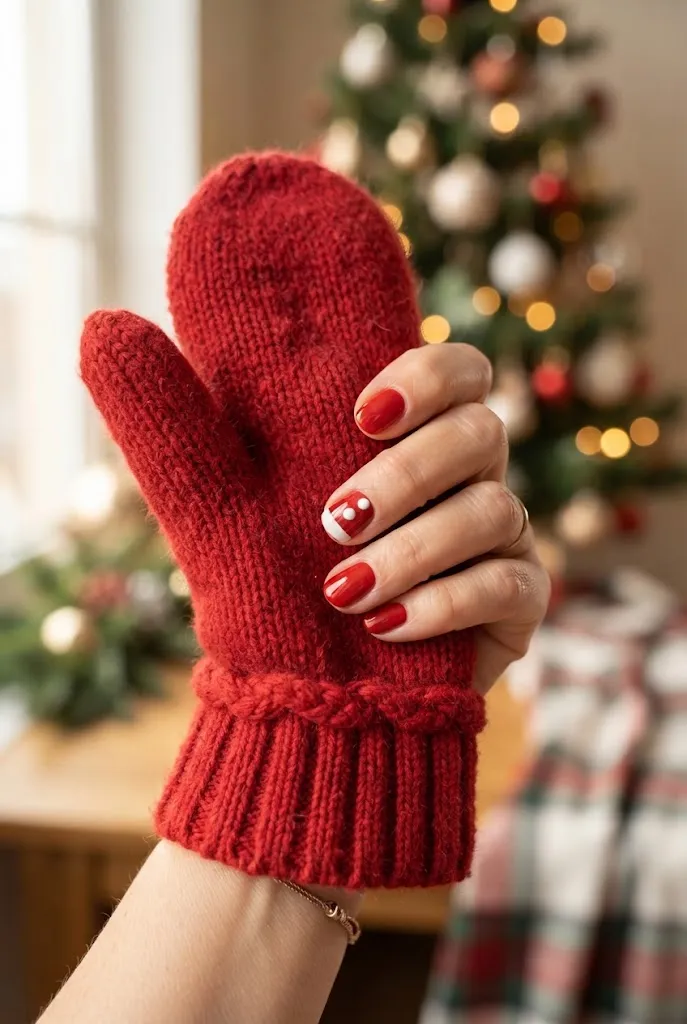
This one needs three colors but only a few steps. Paint the nail red, then add a white band across the tip to form the fur trim. Use a dotting tool to place a small white dot at the top corner for the pom-pom.
If you prefer, tilt the white band slightly to suggest a hat that has been pushed to one side. Keep the other nails solid red or white so the hat reads clearly. It’s a small, cheerful detail that works well for a Christmas party.
19. Gold Glitter French Tips

A glittery tip adds some sparkle without covering the whole nail. Start with a sheer pink or nude base. Then paint a slim curved line of gold glitter polish across the tip of each nail.
Glitter polishes are thicker, so tidy the edges with a small brush dipped in remover before applying top coat. A smooth top coat is especially useful here, because it levels the raised texture and keeps the glitter from catching on fabric.
20. Matte Forest Green With Glossy Dot Details

Mixing finishes gives a simple color extra depth. Paint your nails in a deep forest green and apply a matte top coat. Once it’s fully dry, use a dotting tool and regular glossy clear polish to place a small cluster of dots on one or two nails.
The glossy dots catch the light against the flat background, so the pattern shows up without needing a second color. It’s a quiet option for anyone who prefers texture to obvious decoration.
21. Starry Midnight Blue
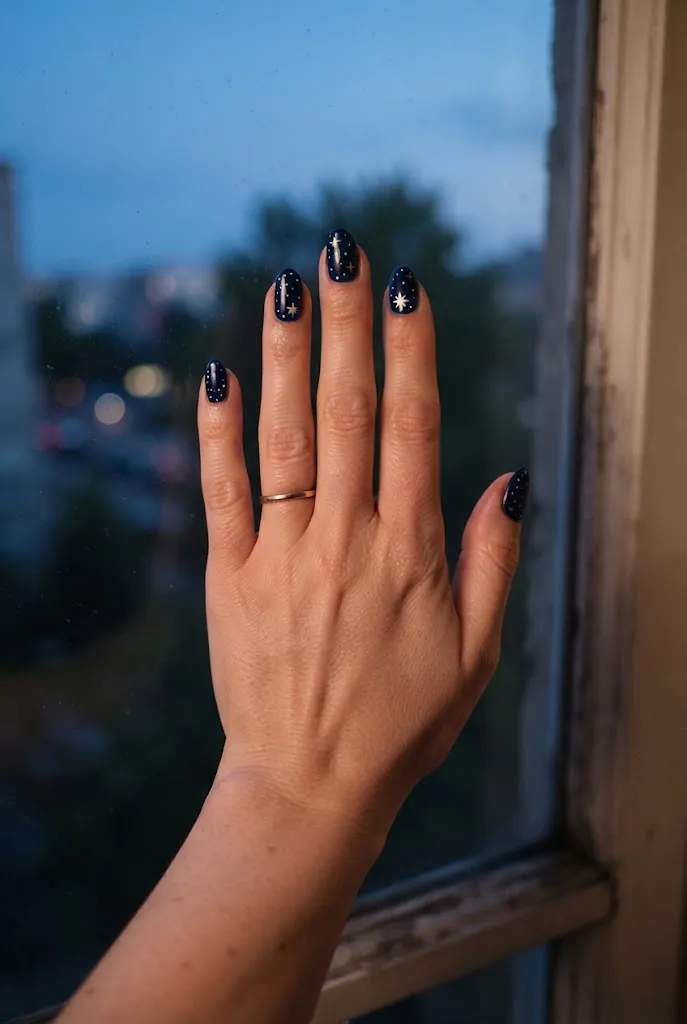
Not every Christmas manicure has to be red or green. Deep navy sets the scene for a winter night sky. After two coats of navy, add tiny white or gold dots with a dotting tool, scattering them unevenly across the nail.
For a few larger stars, draw a small plus sign with a thin brush and add a dot at the center. Use just two or three of these to avoid crowding the design. A glossy top coat gives the navy a deeper, wet-look finish.
22. Cozy Sweater Texture

A knit pattern can be built from simple V shapes. Paint the nail in cream, oatmeal, or soft gray. Once dry, use a thin brush and a slightly darker or contrasting shade to draw small V shapes stacked in vertical columns, like the stitches on a cable-knit sweater.
Keep the design to one or two accent nails, since it takes patience. It’s a slower project than most on this list, but it’s more of a repetition exercise than a skill one, and the result looks like a winter sweater in miniature.
23. One Red Nail on a Neutral Set

Sometimes the simplest idea works best. Paint nine nails in a soft beige, milky white, or sheer pink and paint one nail, usually the ring finger, in a bold red. That’s the entire design.
The contrast is enough to signal the season, and it’s easy to grow out because the neutral nails hide small amounts of regrowth. It’s an easy option for anyone who wants to wear something festive to work without drawing much attention.
24. Red and White Polka Dots

Start with a solid white or red base on every nail. Using a dotting tool, place evenly spaced dots in the opposite color across each nail, or alternate by finger so one hand has red dots on white and the other white dots on red.
Dots are one of the easiest nail art techniques because the tool does most of the work. Re-dip the tool every one or two dots so the size stays consistent, and wait for everything to dry before adding top coat so the dots don’t smear.
25. Champagne Shimmer for Holiday Parties
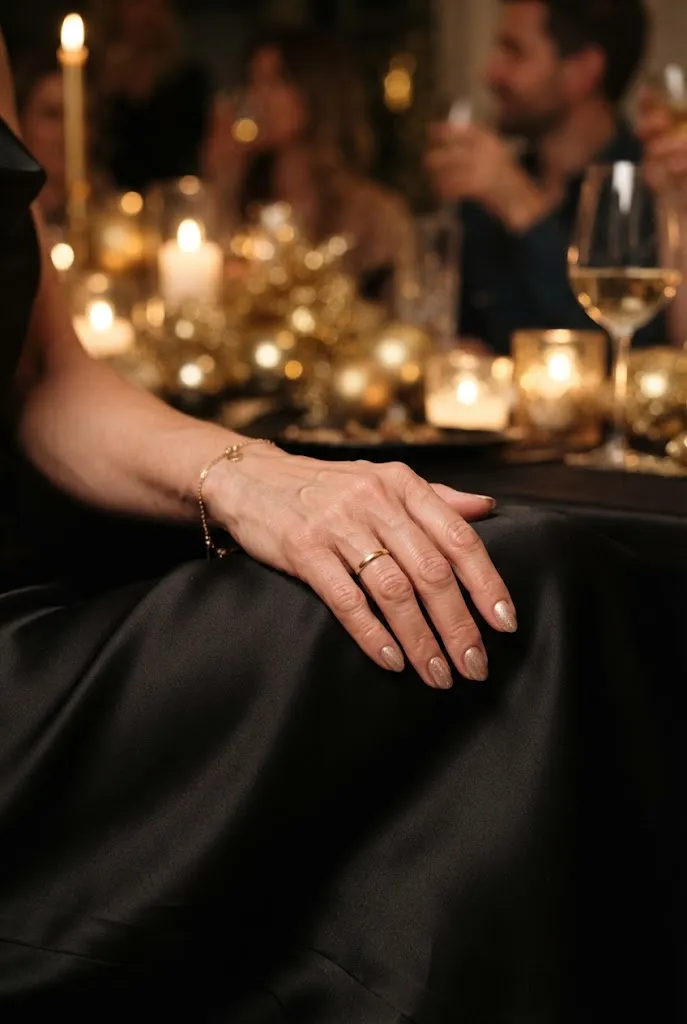
When the occasion calls for something a bit dressier, a champagne-toned shimmer polish gives a soft, warm sparkle. Apply two coats over a bare nail or a sheer beige base, then finish with a glossy top coat.
The finish works with red lipstick, dark green velvet, or a black dress, and it carries through to New Year’s Eve with no changes. It’s a good candidate for anyone who wants one polish to cover several December events.
26. Little Reindeer Face
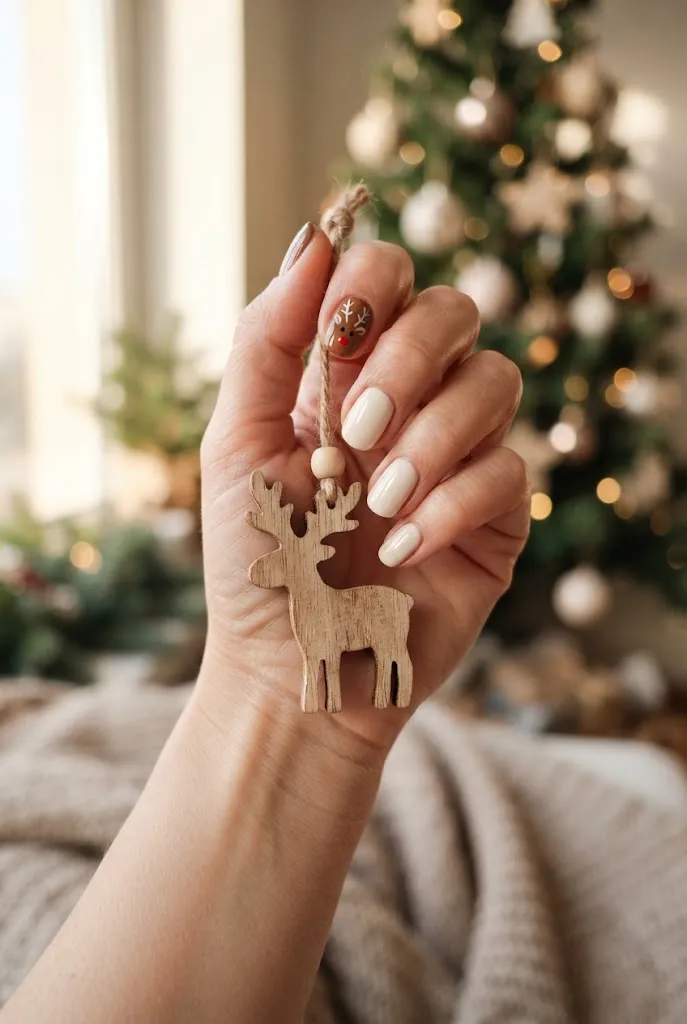
On a medium brown base, use a dotting tool to place two small black dots for eyes near the middle of the nail and one red dot below them for the nose. Add two thin antler lines at the top with a fine brush, branching into small forks.
Keep it to one nail. A single reindeer face is charming, while several can start to feel busy. Pair it with plain brown or cream nails for balance, and finish with a clear top coat.
27. Single Ornament Nail

Paint a solid circle in the center of a pale nail using red, green, or gold polish. Add a tiny gold rectangle at the top for the ornament cap and a thin curved line above it for the hanger. A small white dash across the circle gives the impression of a highlight.
The circle can be made with a dotting tool, or by pressing a small round brush down and lifting it. Try making each accent nail a different color for a set of ornaments across your hand.
28. Icy Blue Frost

For a cool-toned set, choose a pale blue polish with a subtle shimmer and apply it in two thin coats. Finish with a glossy top coat, which gives the nails a glassy, frozen appearance.
If you want more detail, tap a little white glitter or a fine silver shimmer along the tips with a sponge. It suits short square nails especially well, and it pairs nicely with gray knitwear and silver jewelry.
29. Press-On Nails or Nail Strips for a No-Skill Holiday Set

If freehand designs aren’t appealing, holiday press-on nails and nail polish strips deliver finished patterns in a few minutes. Press-ons come in many lengths and shapes and are applied with adhesive tabs or nail glue. Polish strips are stuck on directly and trimmed to fit.
For the best result, clean and lightly buff your natural nails first, size each press-on before applying, and press firmly for several seconds. You can also use a press-on only on the accent nail and paint the rest by hand.
Basic Tools Worth Having
You don’t need a large kit to do most of these designs. A small set covers nearly everything above:
- Base coat and glossy top coat
- A dotting tool (or a bobby pin)
- A thin nail art brush
- Striping tape or tip guides
- A makeup sponge
- Nail polish remover and a small brush for cleanup
Choosing Where to Start
If you’re new to nail art, try ideas 1, 15, or 23 first. They need almost no technique and still look festive. Once you’re comfortable, add a dotted design like the holly berries or polka dots, which rely on a single tool. Save the plaid, sweater, and reindeer designs for an evening when you have time to work slowly.
Pick the finish you’ll actually wear: cream for a classic look, shimmer for parties, matte for something quieter. Even one small detail is enough to make a manicure feel like Christmas.