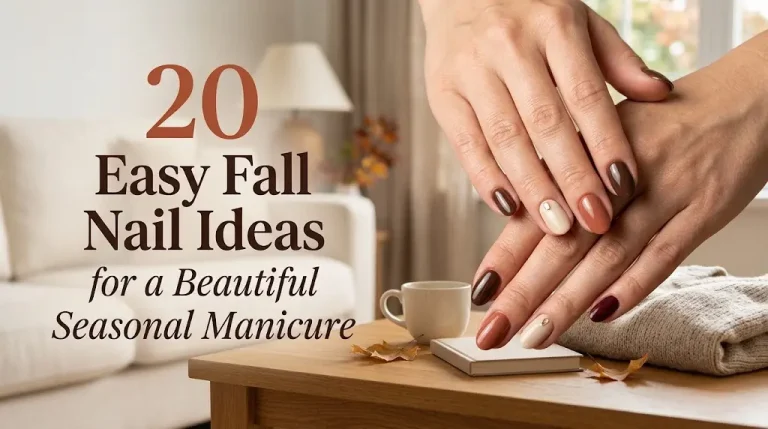
32 Easy Almond Nail Designs for Beginners and Nail Art Lovers
Introduction
Almond nails have a built-in advantage: the tapered tip and softly rounded sidewalls make fingers look a little longer, and they suit almost any design you put on them. That’s why so many easy almond nail designs rely on one simple move, like a thin French line, a single gem, or a sheer wash of color, rather than elaborate art. The shape does a lot of the work.
This collection covers 32 looks for every comfort level. Some need nothing more than a steady hand and one polish color. Others use a dotting tool, a striping brush, or a makeup sponge, all of which are inexpensive and easy to find. You’ll also find notes on where a salon visit makes more sense, plus ideas for short, medium, and long almond lengths. Pick one to try this weekend, or save a few to show your nail tech.
1. Barely-There Milky Pink

A sheer, milky pink is the easiest place to start because it forgives almost everything. The color looks like your own nail on a good day, only smoother and slightly brighter, so small streaks or uneven edges don’t read as mistakes. It also grows out gracefully, which matters if you can’t get to the salon every two weeks.
- Apply two thin coats rather than one thick coat, letting each layer settle before the next.
- Cap the free edge by running the brush along the tip of the nail.
- Finish with a glossy top coat for that just-polished look.
It works at an office, a wedding, and a weekend farmers market equally well.
2. Classic Soft White French

The French manicure never really leaves, and almond nails are arguably its best canvas. The curved tip follows the natural taper, so the white line looks more graceful than it does on a square nail. A soft, slightly creamy white looks more current than a stark, bright one.
Quick Tip: If drawing the smile line freehand feels risky, use a thin striping brush and rest your pinky on the table. Anchoring your hand makes the line noticeably steadier. French tip guide stickers are another beginner-friendly shortcut.
3. Micro French Line
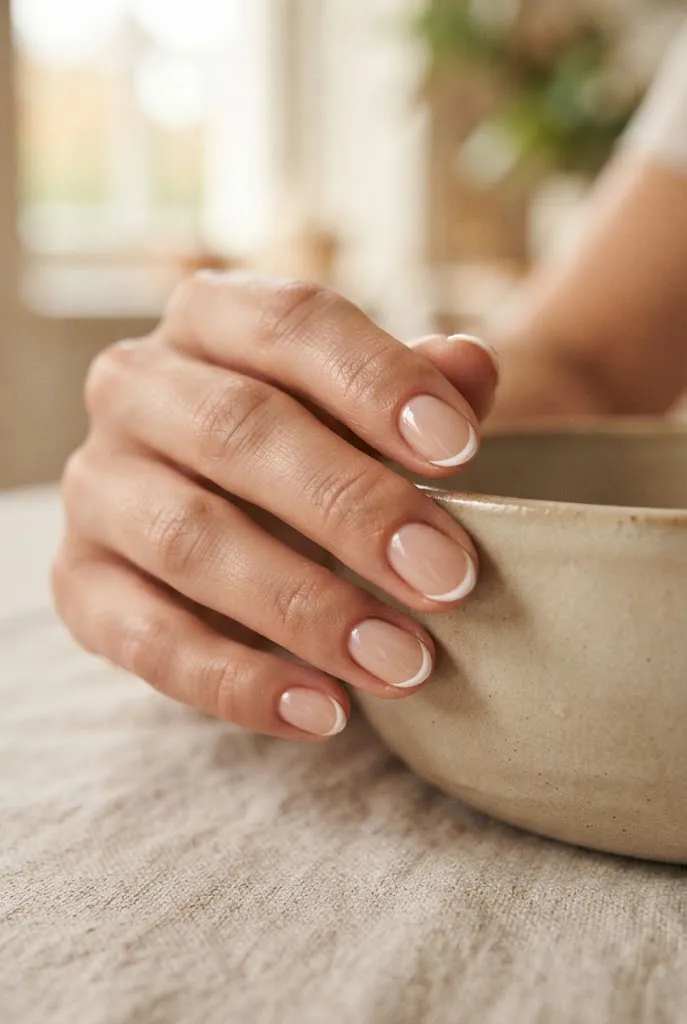
If the classic French feels too heavy, shrink it. A micro French is a hairline of color right at the tip, often in white, but it’s equally good in taupe, black, or a muted pastel. On almond nails, it traces the point and makes the shape look sharper without adding visual weight.
| Line Color | Effect | Best Fit |
|---|---|---|
| White | Crisp, clean | Everyday and formal |
| Taupe or mocha | Soft, understated | Neutral wardrobes |
| Black | Graphic, modern | Evening and edgy outfits |
Use the thinnest brush you own and pull the line from one sidewall to the other in one motion. Two quick strokes meeting in the middle give a more natural curve than trying to do it all at once.
4. Pearl Chrome Glaze
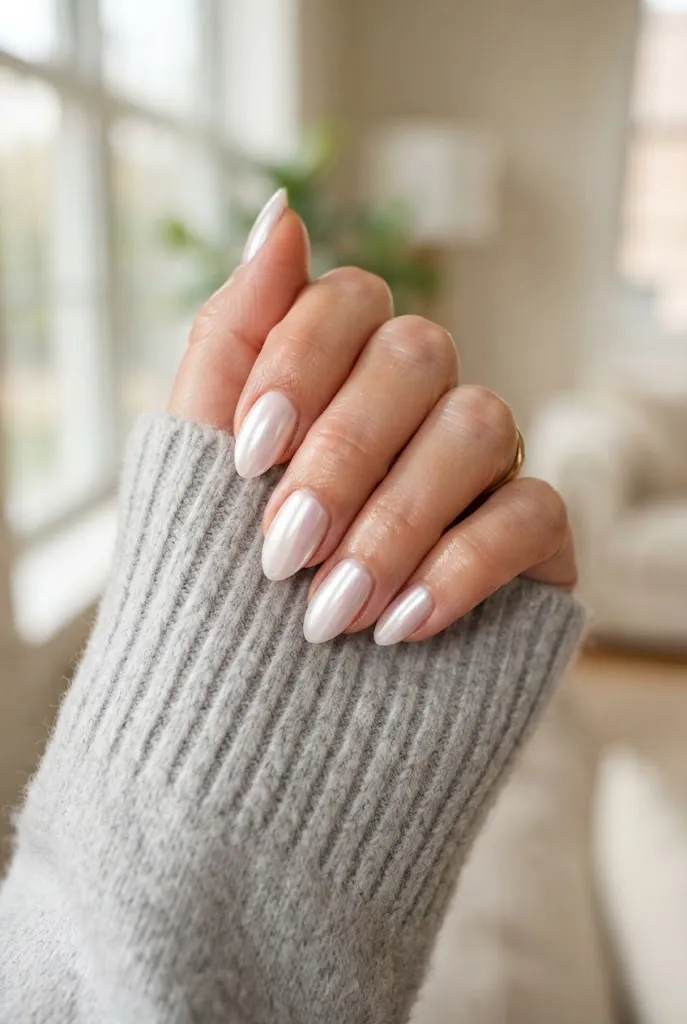
Chrome powder gives nails a soft, pearly shimmer that looks like the inside of a shell. The finish usually goes over a milky white or sheer pink gel base, which is why it needs a gel lamp to cure properly. It’s one of the few trending finishes that’s genuinely easier than it looks, because the powder is rubbed on with a small applicator and doesn’t require any artistic skill.
- Cure a gel base color, then a no-wipe top coat.
- Rub the chrome powder over the cured surface until the shimmer is even.
- Seal with a second layer of top coat.
Editor’s Note: Pearl chrome shows every bump on the nail surface, so smooth buffing before the base color pays off. Skipping that step is the most common reason the shine looks patchy.
5. Gold Foil Accent on a Nude Base

Gold foil is a forgiving way to add sparkle because the flakes are irregular by design. You can’t really place one wrong. Press a few pieces onto the ring finger, or scatter a few across all ten nails for a more relaxed look.
The usual method is to dab a tacky layer of gel or top coat, press the foil down with a silicone tool or a small brush, then seal over it. Keep it to three or four flakes per nail so the nude base stays visible.
Gold works best against warm beiges, soft caramels, and pale peaches. On cooler, pinkish bases, silver foil can look more cohesive.
6. Latte Neutral Skittle
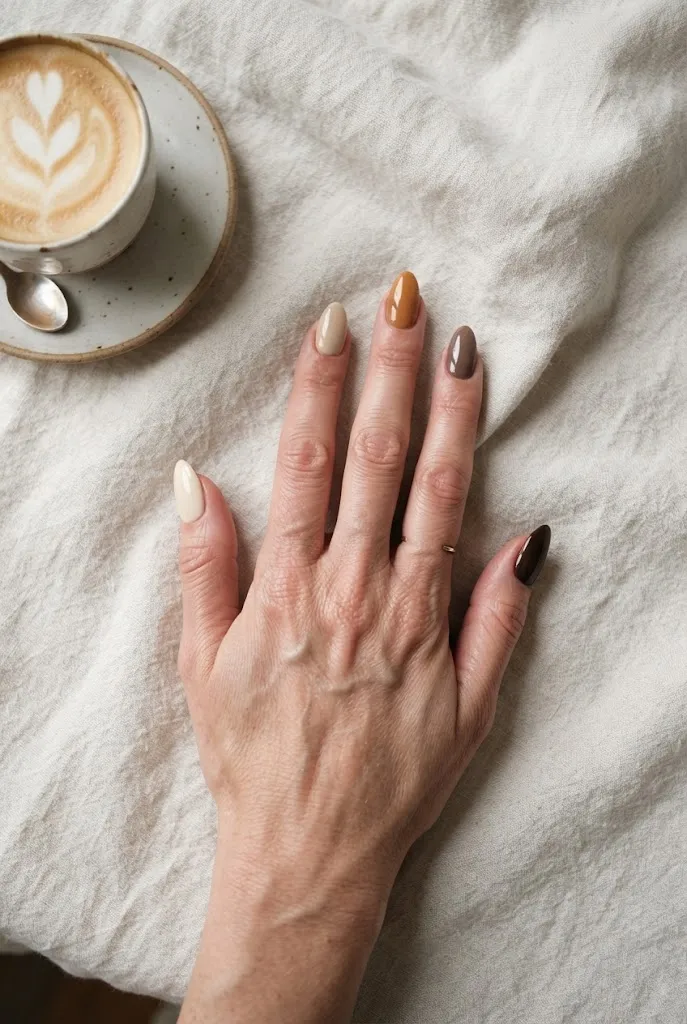
A skittle manicure uses a different shade on each nail. In a latte palette, those shades stay close together: cream, oat, caramel, mocha, and espresso. The result looks deliberate and calm rather than busy, and it solves the usual problem of choosing just one neutral.
- Pick five polishes within a similar undertone, all warm or all cool.
- Arrange them light to dark across one hand.
- Repeat the order on the other hand, or mirror it.
All solid colors means no nail art skill is needed. It’s essentially a color-matching exercise.
7. Minimal Polka Dots

Small dots in a contrasting color are one of the most beginner-friendly forms of nail art. A dotting tool, or even the tip of a bobby pin, makes perfectly round dots without any drawing. Try black dots on a pale pink base, white dots on navy, or cream on sage.
Do: Keep dots small and spaced out, with two or three per nail.
Don’t: Fill the entire nail, which can make the design look crowded on a narrow almond shape.
Let the first dot dry slightly before adding a neighbor to avoid smearing. A clear top coat applied after the dots dry flattens any raised edges.
8. Aura Gradient
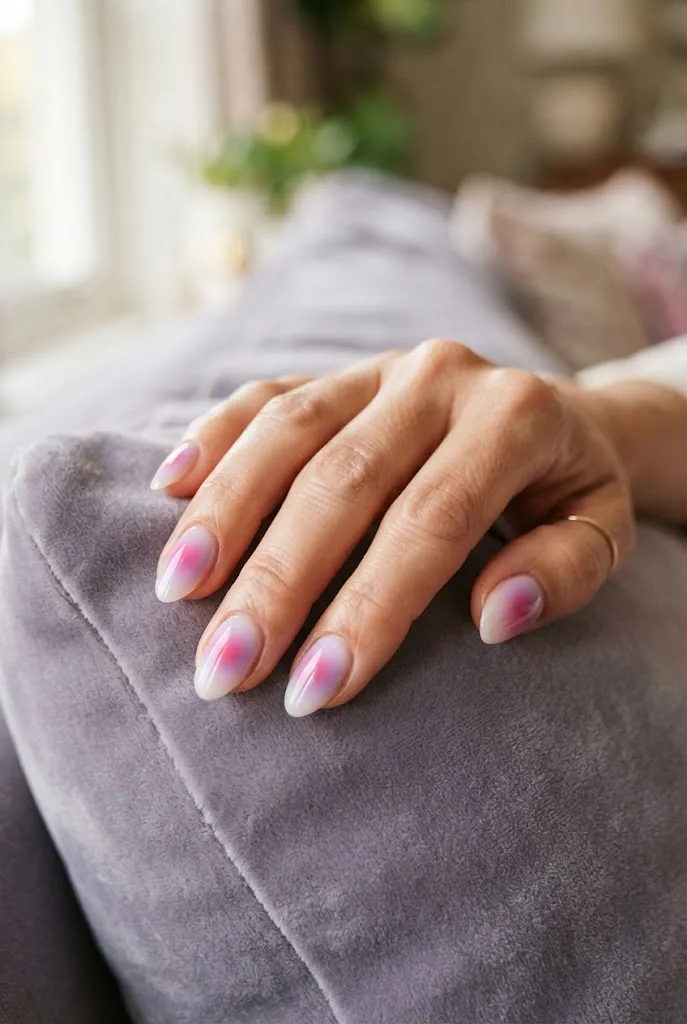
An aura manicure places a soft, blurred halo of color in the middle of each nail, fading outward into a paler base. It looks complicated, but the technique is just a makeup sponge dabbed with polish. Tap one color in the center of each nail, then a second, lighter color around it, and blend the edges by dabbing.
- Paint all nails with a pale base, such as milky white or sheer blush.
- Dab a small circle of accent color onto the center of the nail with a sponge.
- Tap a lighter shade around it to soften the edge.
- Seal with top coat.
Pink-to-lilac and blue-to-mint work especially well. The soft blur is part of the look, so there’s no need for sharp precision.
9. Emerald Velvet Cat-Eye

Magnetic cat-eye polish contains tiny metallic particles that line up when a small magnet is held over the wet nail. The result is a band of light that seems to move as your hand does. Deep emerald is particularly striking on almond nails because the band follows the tapered shape.
The process is simple: apply the colored polish, hold the magnet close without touching for several seconds, then cure under a lamp (for gel formulas). Keep the magnet’s position consistent from nail to nail so the shimmer lines up across the hand.
Editor’s Note: Cat-eye formulas are almost always gel, so factor in a lamp. Regular lacquer versions exist but tend to give a subtler effect.
10. Sage Matte With a Tiny Daisy
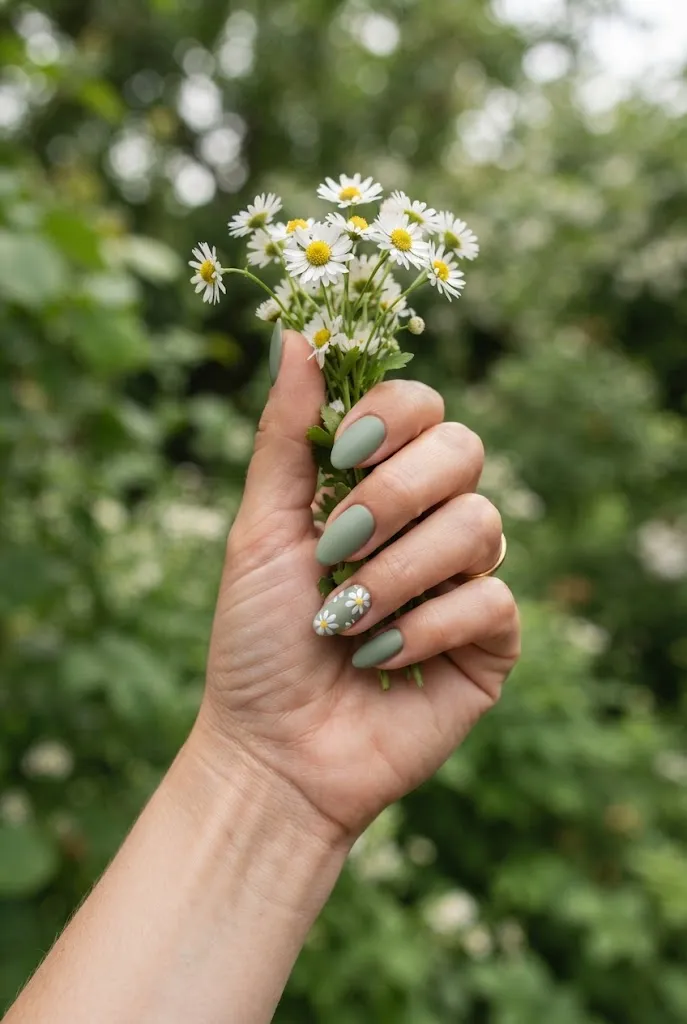
Matte sage green feels earthy and a little vintage. It’s a good option if bright pastels feel too sweet. Add a single tiny daisy to one nail and the whole set looks finished.
To paint a daisy, place five small white dots in a circle with a dotting tool, then put one yellow dot in the center. That’s the entire technique. A matte top coat produces the flat finish, though it’s worth noting that matte surfaces can pick up oils and smudges more visibly than glossy ones.
Try it on the ring finger only, or add a daisy to the thumb on each hand for balance.
11. Baby Blue Cloud Ombré
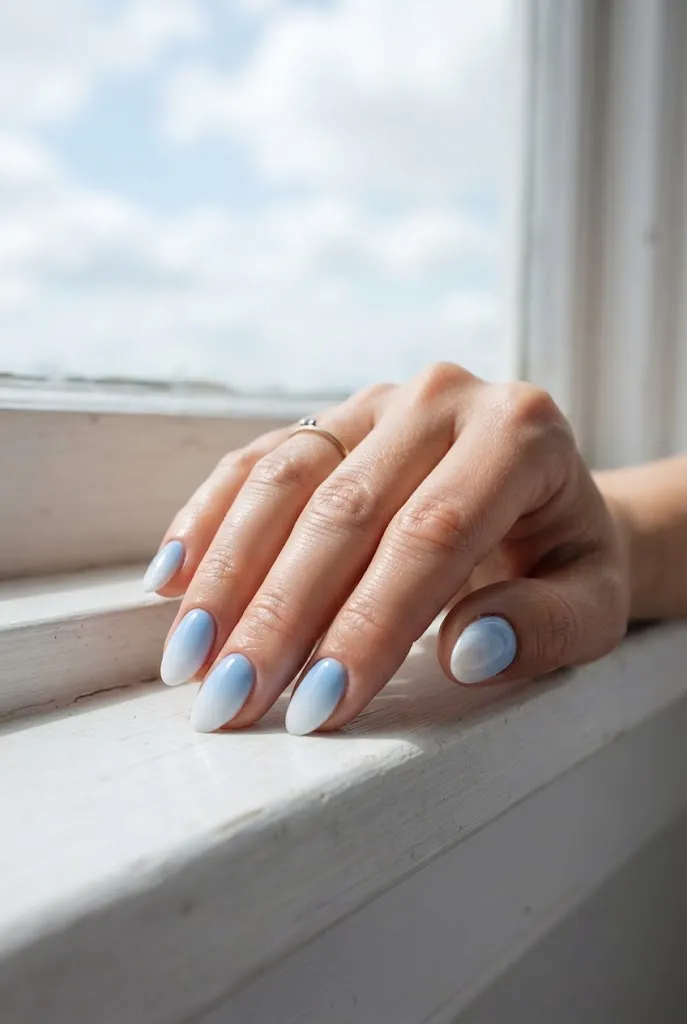
Sponge ombré is one of the easiest gradients to do at home. Paint a white base, dab pale blue on a makeup sponge, and press it onto the nail from the tip upward. The color softens naturally where it meets the white, and the sponge texture gives it a cloud-like fade.
- Use a fresh sponge corner for each hand to avoid muddy colors.
- Build the blue in two or three light dabs rather than one heavy one.
- Finish with a gloss top coat to smooth the sponge texture.
A touch of white along the cuticle keeps the effect airy, particularly good for spring and summer.
12. Wine Red With a Mini Heart
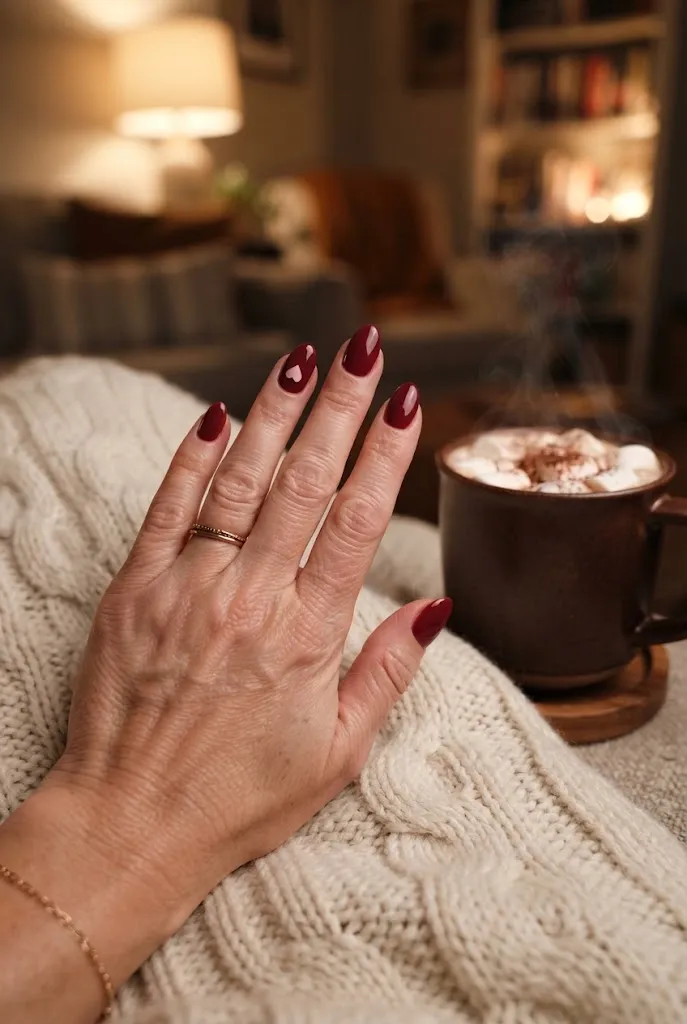
Deep wine red is a reliable cold-weather color, and one small heart on an accent nail adds personality without taking over the set. The heart can be painted in blush pink, cream, or gold.
Common Mistake: Making the heart too large, so it fights the nail’s narrow shape.
Better Approach: Keep the heart under about a third of the nail’s width and place it slightly off-center. The asymmetry feels more relaxed, and a smaller shape reads as a detail rather than a sticker.
Two dots side by side, pulled together into a point with a toothpick, make a neat heart with no drawing skill needed.
13. Reverse French With a Gold Half-Moon
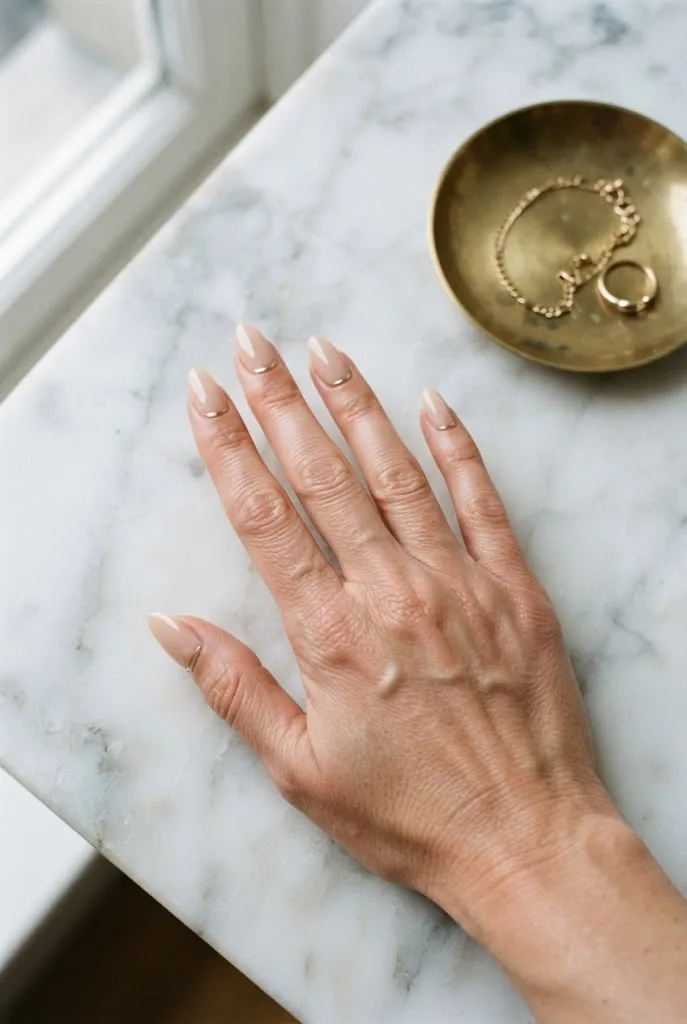
A reverse French flips the placement and puts a thin curve of color at the base of the nail, tracing the cuticle line. It’s a quieter alternative to a traditional French and works especially well on longer almond nails, where it shows off the nail bed.
Use a thin gold line, or a sheer white curve, over a nude base. A small piece of tape or a half-moon guide sticker can keep the curve even.
Because the design sits close to the skin, clean cuticles matter more here than with other looks. Take a moment to tidy them before painting.
14. Tortoiseshell Swirl
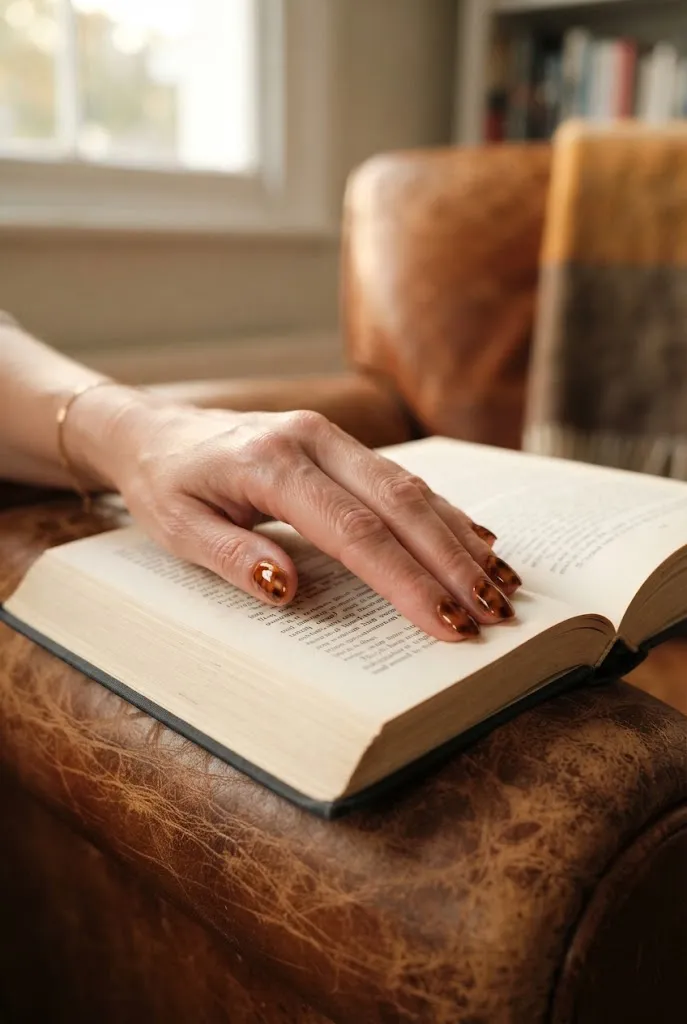
Tortoiseshell nails borrow the amber, brown, and honey tones of vintage eyewear. The look works in fall and winter, but it’s warm enough to wear year-round. It also suits shorter almond nails nicely, since the pattern is dense and doesn’t need much surface area.
- Paint a sheer amber or caramel base.
- Dab irregular spots of dark brown and burnt orange with a small brush.
- Use a clean brush to gently swirl the edges together.
- Finish with a thick, glossy top coat.
Irregular shapes are the point. If it looks too neat, add one more uneven spot.
15. Skinny Black Stripes on Nude

A few thin black lines over a nude or sheer base give you a graphic look with very little effort. Try one or two vertical lines on each nail, a single diagonal across the ring finger, or lines that cross near the tip.
A striping brush or a nail art pen makes this far easier than a standard polish brush. If your hand shakes, steady it against the table and paint the line in short, confident strokes.
| Line Style | Look | Difficulty |
|---|---|---|
| Single vertical line | Minimal, clean | Easiest |
| Crossed lines | Graphic, architectural | Moderate |
| Diagonal across one nail | Accent, playful | Easy |
The nude base keeps the black lines from feeling severe.
16. Soft Checkerboard Accent

A checkerboard is more approachable than it looks if you use a grid guide or a bit of striping tape. In soft pink and cream, it feels playful but restrained. Limit it to one accent nail and keep the others in a solid color from the same palette.
Paint the base, let it dry, then lay a thin strip of tape in a grid and fill alternate squares. Remove the tape while the polish is still slightly tacky to keep the edges clean.
Keep the squares large relative to the nail so the pattern stays readable on a narrow almond shape.
17. Mismatched Pastel Skittle
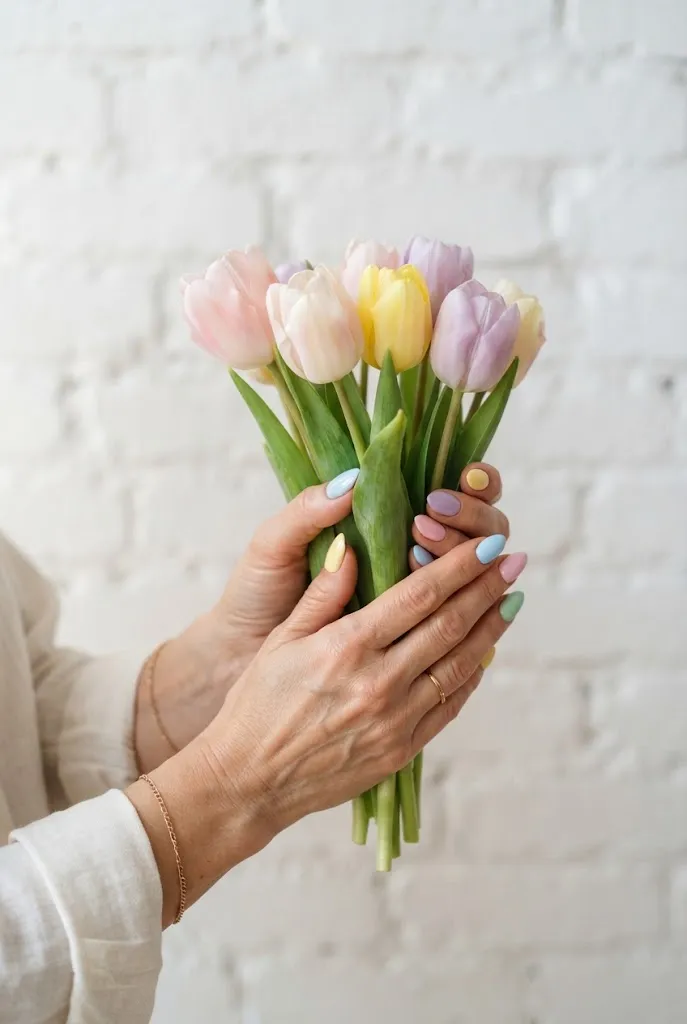
Where the latte skittle stays in one color family, this one embraces variety: butter yellow, mint, lilac, baby pink, and sky blue, one per nail. The soft, chalky tones keep the mix from looking loud, and the almond shape gives each color a clean, narrow stage.
- Choose pastels with similar softness so no single shade dominates.
- Repeat the sequence on the second hand, or shift it by one nail for a more playful look.
- Use a glossy top coat; matte can make pastels look flat and chalky.
It’s an ideal spring option, and because every nail is a solid color, there’s nothing to draw.
18. Celestial Navy With Tiny Stars
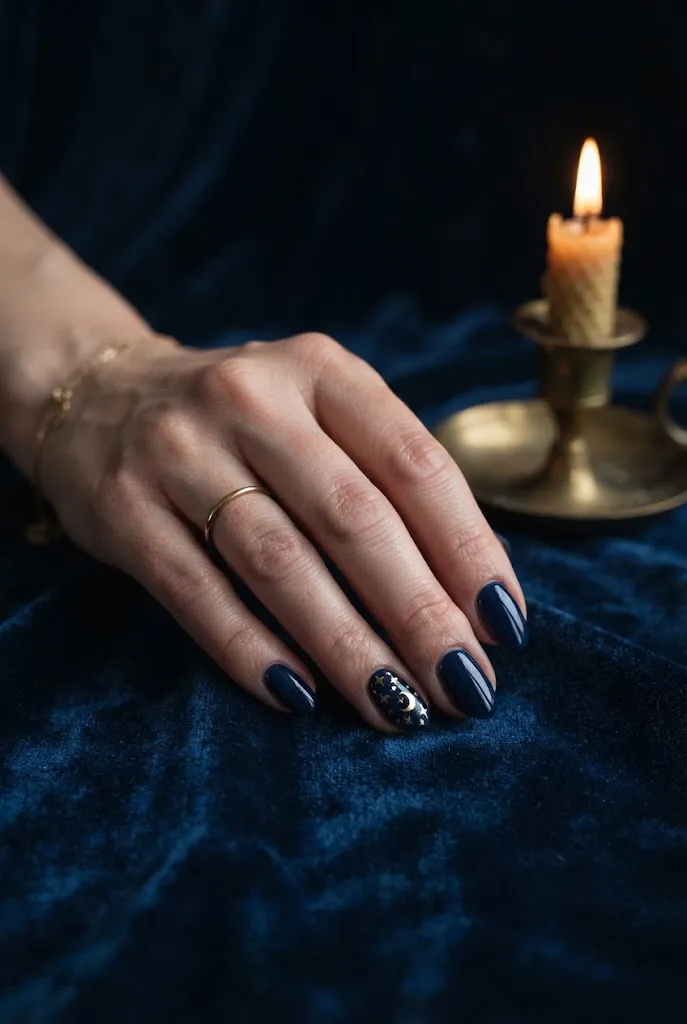
Deep navy gives the nails a night-sky backdrop, and a few small gold or silver stars finish the scene. Stars can be painted with a fine brush, applied as tiny metal studs, or placed with sticker decals if hand-painting isn’t appealing.
On almond nails, a small crescent moon near the tip and two or three tiny dots nearby look especially elegant. Leave plenty of dark space between the details so the design reads as a night sky rather than a collage.
Editor’s Note: Navy can look black in dim lighting, so the details need contrast to show up. Gold and silver both work, and white is the simplest choice.
19. Wavy Squiggle Lines
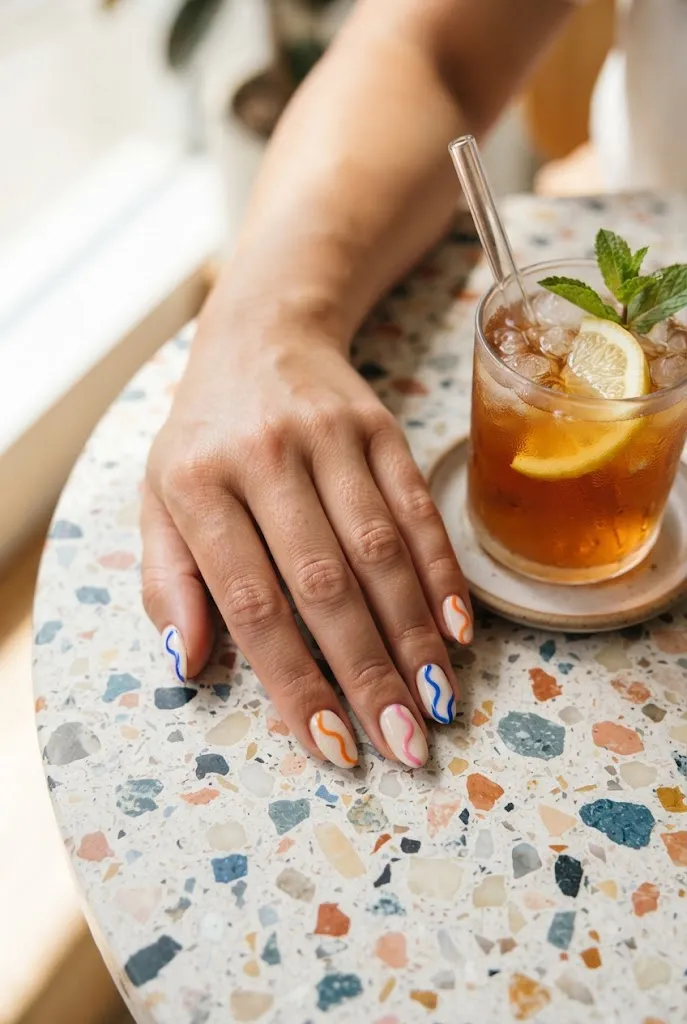
Squiggles are one of the most forgiving nail art shapes, since imperfection is built in. A single wavy line across the middle of each nail in a contrasting color feels modern and relaxed. Alternate colors across the hand, or stick with one color on a neutral base.
- Paint and cure a solid base color.
- Using a thin detail brush, draw a loose wavy line from one side of the nail to the other.
- Repeat with a second color if you like.
- Seal with top coat.
No ruler or tape needed, so it’s quick. Squiggles in cobalt, orange, or pink look playful on a cream base.
20. Glitter Tip Fade

A glitter fade starts dense at the tip and thins toward the middle of the nail, which makes the sparkle feel like it’s dissolving. It’s less formal than a full glitter nail and much easier to grow out.
Apply glitter polish to a makeup sponge and dab it onto the tips, building density at the edge and tapering as you move toward the cuticle. A sheer pink or clear base keeps it light.
Silver or champagne glitter suits most occasions, while holographic works better for parties. If you’re wearing a regular lacquer, a thick top coat smooths the gritty texture.
21. Double French in Peach and Cream

A double French stacks two thin lines along the tip, usually in two close colors. Peach and cream make a warm, sunny version, and the pairing feels friendlier than the starker white-on-pink classic.
| Technique | What It Takes | Result |
|---|---|---|
| Striping brush | Steady hand, two thin lines | Hand-painted look |
| Guide stickers | Placement and patience | Crisp, even lines |
Paint the outer, closer-to-the-tip line first. Let it dry briefly, then add the second line just inside it with a small gap in between. Keeping the gap consistent matters more than keeping the lines perfect.
22. Wildflower Dot Clusters
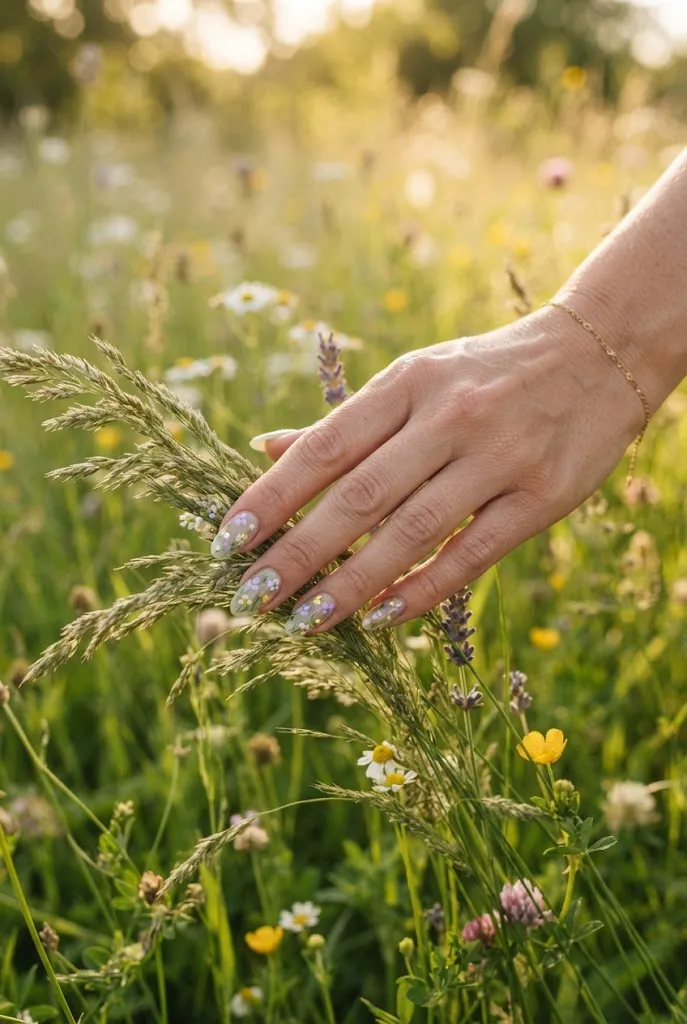
Tiny flowers made from dots are a gentle step up from plain polka dots. Each bloom is five or six small dots around a center point, in white, lilac, or pale yellow. Scatter several across a sheer green or nude base for a meadow effect.
Vary the flower size slightly and leave empty space between clusters. A thin green line with two small dashes for leaves can suggest stems if you want a more detailed look, though that step is optional.
A dotting tool in two sizes, one large and one small, gives you enough range without buying specialized brushes.
23. Terracotta Cream

Terracotta is a muted orange-brown that suits autumn but works in any season. As a cream polish, it looks solid and earthy. It pairs especially well with gold jewelry and cream or rust-colored sweaters.
Do: Use two coats for even opacity, since cream formulas can streak.
Don’t: Skip the top coat if you want depth. Without it, the color can look flat.
This is a good pick for anyone who wants a color that feels warm but not loud. It also grows out well, since the shade is close to the natural tone of many skin tones.
24. Marble Swirl

Marble nails mimic the soft veining of stone. White and gray is the classic combination, but blush and cream, or black and gold, work too. The effect looks sophisticated, but the technique is surprisingly loose.
- Paint a white or pale base.
- Dab a few dots of gray on the nail.
- Drag a thin brush through the dots to create soft veins.
- Add a very fine line or two in black or gold.
- Seal with a glossy top coat.
One method is to use plastic wrap to dab and crinkle the polish, creating organic marbled patterns. Either way, it’s hard to go wrong because natural stone has no rules.
25. Soft Leopard Spots
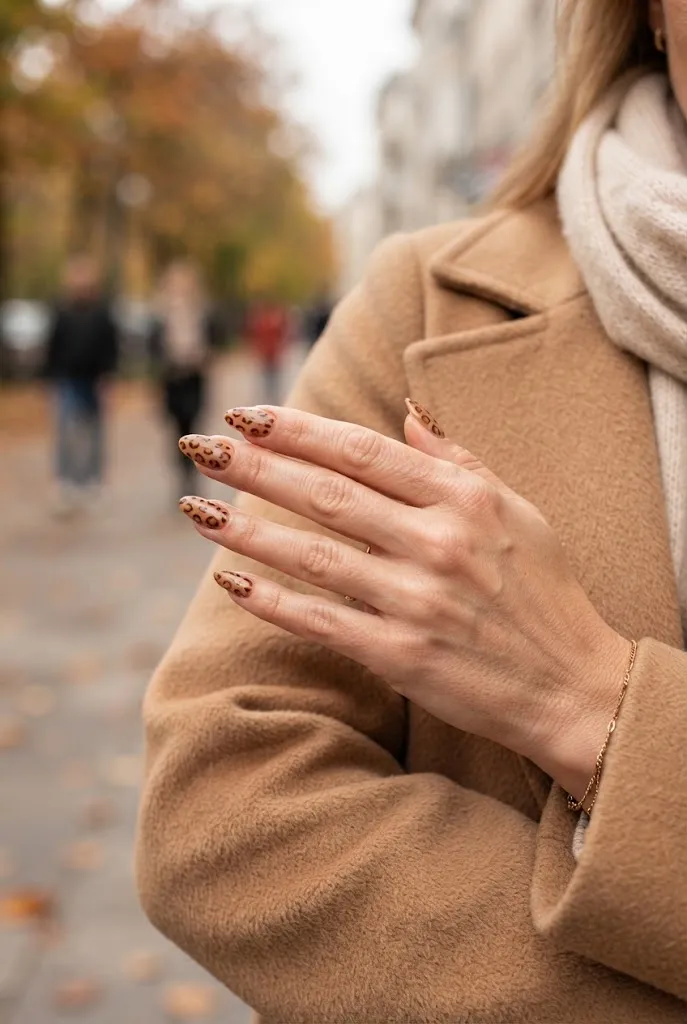
Leopard print is a good beginner pattern because the spots are meant to be uneven. A soft caramel base with espresso-brown spots and a few tan outlines looks warmer than harsh black-on-beige versions.
Use a small detail brush to dab irregular, C-shaped spots in dark brown. Vary the size, and let some spots sit near the nail’s edge. Don’t try to space them evenly.
Quick Tip: Make a few spots overlap the tip so the pattern looks as though it continues past the nail. It’s a subtle detail that makes the print feel natural.
26. Snowflake Dots on Icy Blue

A winter set doesn’t need much. A pale, icy blue base with a few white dots arranged into snowflake shapes feels seasonal without being literal. Draw a short cross with a thin brush, add a second cross over it, and finish with small dots at the tips.
- Keep snowflakes small; one or two per nail is plenty.
- Add a few extra dots around them to suggest falling snow.
- A shimmery top coat adds a frosted feel.
This works from November through February and easily transitions into everyday wear once the holidays pass.
27. Single Rhinestone at the Cuticle
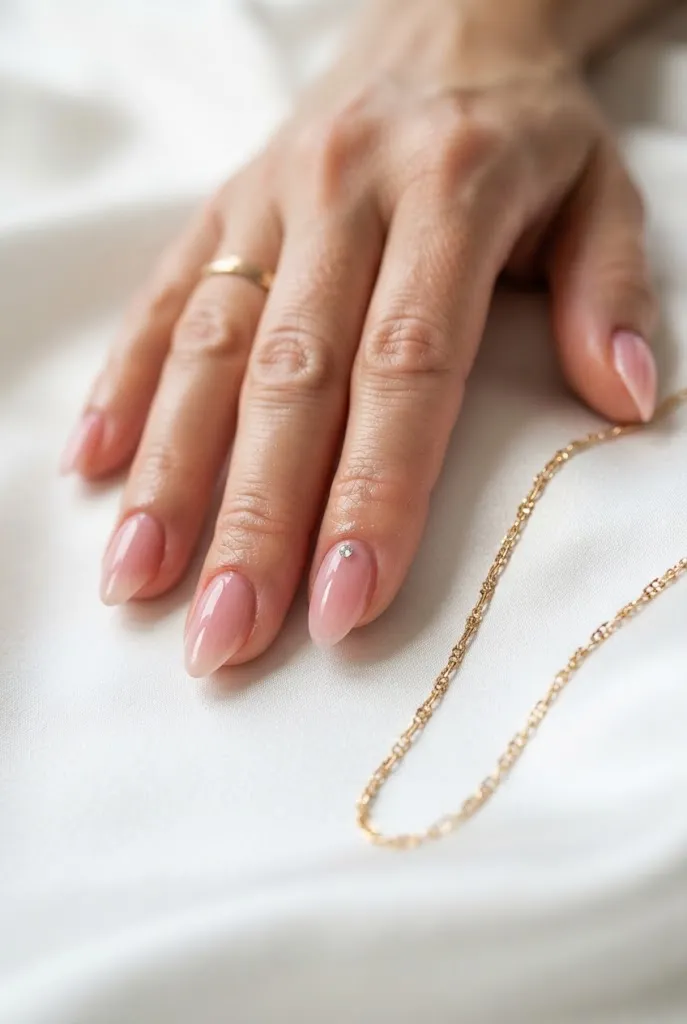
One tiny gem placed near the base of the nail adds sparkle with almost no effort. It catches the light each time your hand moves, and because the placement is so small, it works at the office too.
Apply a dot of nail glue or gel to the spot, set the rhinestone with a wax pencil or tweezers, and seal around the edges with top coat. Avoid covering the top of the stone; that dulls the sparkle.
Clear, pearl, or soft pink stones look subtle. A colored stone, such as emerald or sapphire, makes the detail more visible.
28. Mini Pearl Accents for Bridal Looks

Tiny pearls give a manicure a soft, polished finish that suits weddings, showers, and formal events. They’re usually placed along the cuticle line, or in a small cluster on one accent nail, over milky white or sheer blush.
- Apply a milky base and cure or dry it fully.
- Dot gel adhesive where each pearl will sit.
- Place the pearls with a pick-up tool.
- Cure, then seal around the edges.
Editor’s Note: Embellishments catch on hair and fabric. For a long event, keep the pearls to one or two nails and use a strong top coat to secure them.
29. Holo Flake Over Lavender

Holographic flakes scatter tiny rainbow glints across a base color. Over a sheer lavender, the effect looks like light on a soap bubble, soft and shifting rather than loud.
Many polish lines sell flake top coats that can be applied directly over color. Use one coat, then add another only where you want more shimmer. The flakes sit slightly raised, so a layer of clear top coat smooths them down.
| Base Color | Result |
|---|---|
| Sheer lavender | Soft, pearly glow |
| Milky white | Brighter, icier shimmer |
| Deep plum | Moodier, jewel-like glints |
This is an easy way to make a single solid color look more special.
30. Lemon Accent for Summer
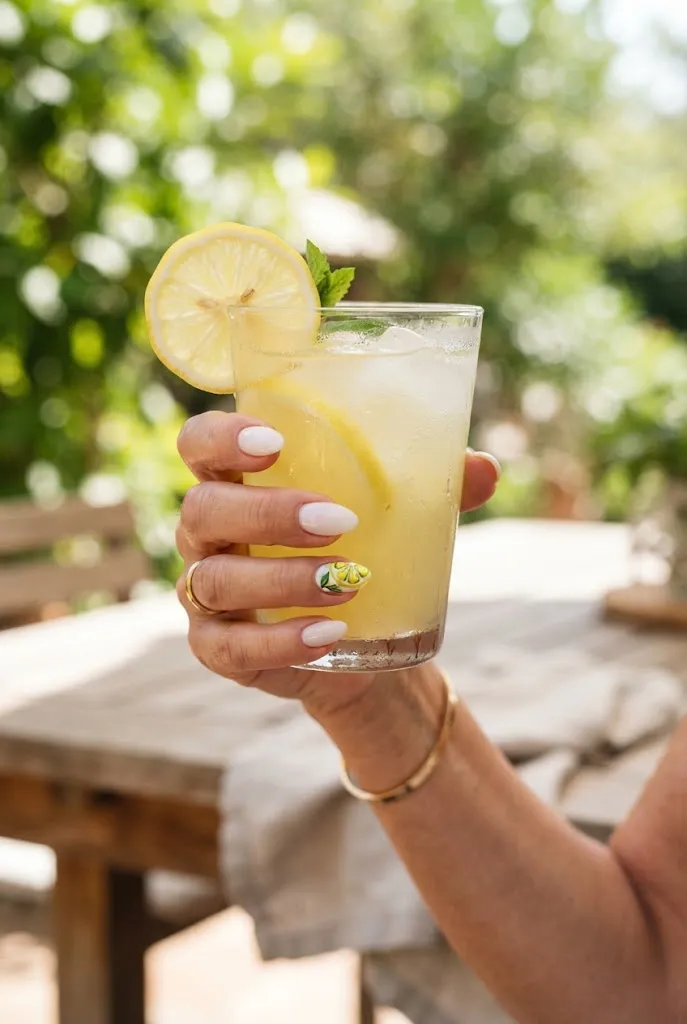
A single lemon slice on a pale yellow or white nail is a summer-friendly accent that’s easier to paint than it looks. Draw a small circle in yellow, add a thin white ring inside it, then draw thin lines radiating from the center like segments.
Keep the rest of the nails in a solid, simple color such as soft white, pale yellow, or sheer green. That way the lemon becomes the focal point.
The design is playful but still small enough to be worn on a regular workday. Try it on a thumb or ring finger.
31. Sleek Black With a Silver Edge Line

Glossy black on almond nails is dramatic by itself. Add a hairline of silver along the tip or around the cuticle, and it becomes a finished, slightly futuristic manicure.
A metallic silver gel or a chrome pen works best for the line, since regular polish can look thick. Run the line along the very tip edge, following the almond curve.
Common Mistake: Applying the silver line too thickly.
Better Approach: Use a nail art pen or the tip of a fine brush, and make the line as thin as possible. A hairline looks intentional, while a thick stripe can look heavy.
32. Bare Gloss and Cuticle Care on Short Almonds

Sometimes the best design is no color. Short almond nails buffed to a soft sheen, with tidy cuticles and a thin layer of clear or sheer polish, look clean and put-together. The shape does the styling for you.
- Shape the nails into a gentle almond with a fine file.
- Push back the cuticles gently after a warm soak.
- Buff the surface lightly for smoothness.
- Apply clear polish or a sheer pink.
- Massage cuticle oil into the edges.
This is also a practical option between longer manicures, or for anyone building a routine before trying nail art. Regular cuticle oil keeps the finished look fresh.
How to Choose Your First Design
Start with how much time you’re willing to spend and how steady your hand feels. Solid colors, one-nail accents, and sponge gradients are the most forgiving. Lines, checkerboards, and small illustrations take more patience. Chrome, cat-eye, and rhinestone finishes need either a gel lamp, a specialty product, or a salon visit.
Pick one look, gather only the tools it requires, and practice on a single nail before committing to a full set. If a design goes wrong, remove it and try again; polish is easy to redo.